
How to Create Product Walkthrough Videos People Finish
Most product walkthrough videos die in one of two ways. Either they’re a 9-minute Loom where the founder says “so, um, let me just find it” four times, or they’re a beautifully edited video of a UI that changed two releases ago.
Both are fixable. To create a product walkthrough video people actually finish, pick one task, write a two-column script (what’s on screen next to what you say), record the screen in a clean demo account, record the voiceover separately, cut every wait, add captions, and embed it next to the written help article. Keep it under two minutes. Plan from day one for how you’ll update it, because the UI will change.
Here’s how to do each step, which tools fit which job, and where the effort really goes.
What counts as a product walkthrough video?
People use “walkthrough”, “tutorial” and “demo” loosely, but they’re different videos with different jobs:
- A demo sells. It shows the best parts of the product to someone who hasn’t bought yet. It can skip steps.
- A walkthrough (or software tutorial video) teaches. It shows an existing user exactly how to complete one task, click by click. It can’t skip steps.
- An onboarding tour orients. It shows a new user around the main screens so they know where things live.
This post is about the second kind: the how-to video for your app that sits in your help center and answers “how do I connect my calendar?” without a support ticket. If you make one kind of video for customers, make this one. It’s the one people search for at the moment they’re stuck.
Step 1: Pick one task, and only one
”How to use the dashboard” is not a task. “How to invite a teammate and set their role” is.
One task per video gives you a clear title, a natural length and an obvious place to embed it. It also makes updates cheaper: when the invite flow changes, you redo one short video instead of chapter 4 of a 20-minute overview.
A good test: can you describe the end state in one sentence? “At the end, your teammate has an invite in their inbox with Editor access.” If yes, you’ve got a video.
Step 2: Write the script in two columns
This is the step people skip, and it’s the reason most walkthroughs ramble.
Open a doc and make two columns. Left: what’s on screen. Right: what the voiceover says. One row per action.
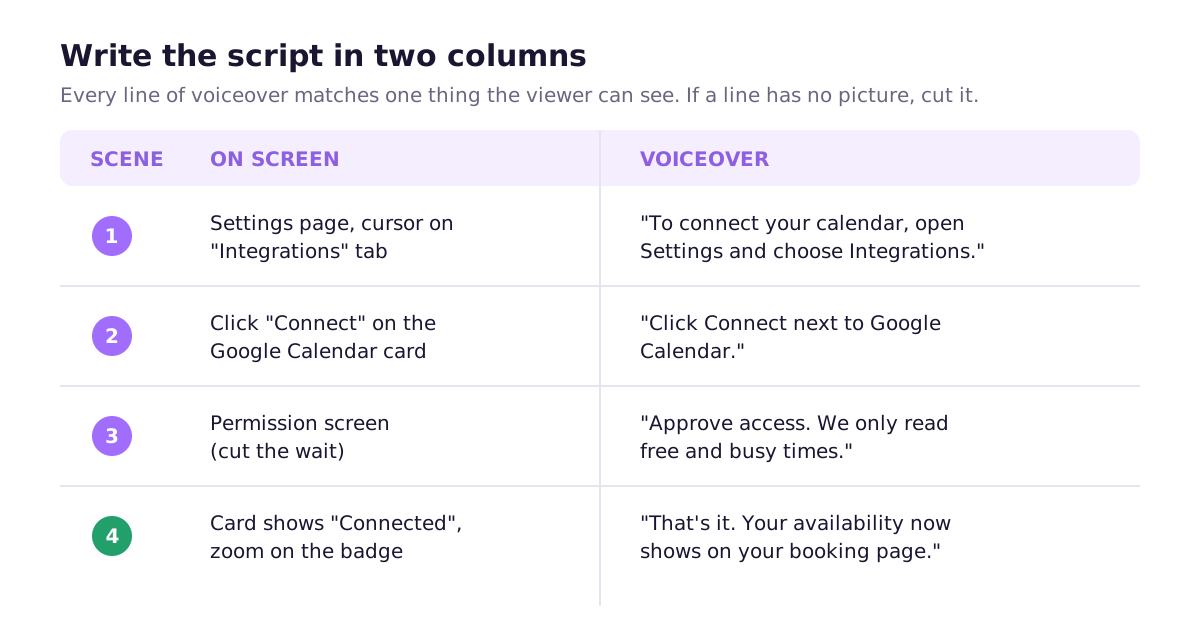
Rules that keep it tight:
- Every voiceover line matches something visible. If you’re talking and nothing is happening on screen, cut the line or add a visual.
- Say what to click, using the exact label. “Click Connect next to Google Calendar”, not “hit the button over here.”
- Don’t narrate the obvious. “Now I’m moving my mouse to the top right” adds nothing.
- Front-load the result. The first sentence can be “In this video you’ll connect your calendar so customers can book time with you.” Then do it.
If you already have a written help article for this task, start from its numbered steps. The video and the article should say the same thing in the same order. (If you don’t have the article yet, our guide on writing help center articles people actually use covers the structure.)
Step 3: Set up a clean recording environment
Ten minutes here saves an hour of editing.
- Use a demo account with realistic fake data. No real customer names, no real inbox, no “test test asdf.”
- Fix the window size. Record at 1920x1080 or 1440x900 and never resize mid-take. Browser zoom at 110 to 125% makes small UI text readable on a phone.
- Strip the browser. Hide the bookmarks bar, remove extension icons, use a fresh profile. Close other tabs.
- Silence everything. Do Not Disturb on, Slack quit, email closed. A notification popping up mid-take means another take.
- Pre-stage the state. If the video starts on the Integrations page with nothing connected, make sure that’s what the account looks like before you hit record.
Step 4: Record the screen and the voice separately
This is the single biggest quality jump for non-professionals.
When you talk and click at the same time, you do both badly. You pause to find things, you say “um”, you click too fast while finishing a sentence. Instead:
- Record the screen silently, following the left column of your script. Move the mouse deliberately. Pause for a beat after each click so the result is visible.
- Record the voiceover reading the right column, in a quiet room with a decent USB mic. Read each line two or three times so you can pick the best.
- Line them up in the editor.
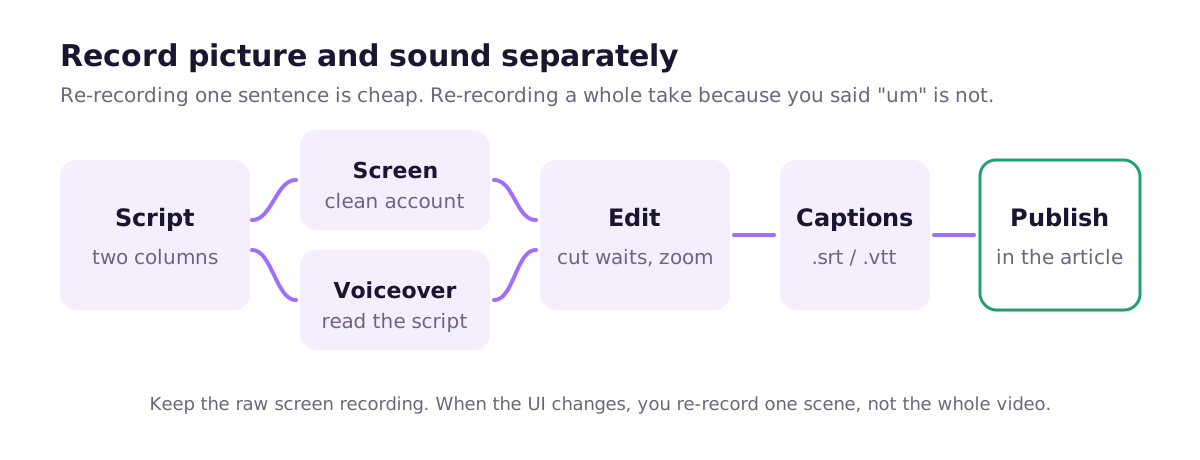
Fixing a sentence becomes a 30-second re-record instead of a whole new take. And when the UI changes but the words don’t, you only re-record picture.
Should you use an AI voice instead of your own? It’s a real option now. A good text-to-speech voice is consistent, never has a cold, and you can regenerate a line after editing the script. Your own voice feels more personal, which matters more for a founder-led product. Either is fine. A bad human recording (echoey room, laptop mic) is worse than a good synthetic one.
Step 5: Edit hard
Your rough cut is too long. It always is. In the edit:
- Cut every wait. Page loads, OAuth redirects, spinners. Nobody needs to watch a loading bar.
- Zoom in on the action. When the click target is small, zoom to it, then zoom back out. Don’t zoom on every click or the video gets seasick.
- Highlight the cursor or add a click ripple, so viewers see where you clicked.
- Skip the intro. No logo sting, no “Hi everyone, welcome to…” Start on the screen.
- Music, if any, very quiet. It competes with the voiceover.
Aim for 60 to 120 seconds for a single task. If you can’t get under three minutes, it’s probably two tasks.
Step 6: Add captions and a transcript
A lot of people watch help videos with the sound off: at their desk, in an open office, on a train. Captions aren’t optional.
Export a .srt or .vtt file (most editors and hosts can generate one; check it, auto-captions mangle product names). Put a short transcript or the numbered steps under the video too. That helps readers who skim, and it gives search engines text to index, which a video file alone doesn’t.
Step 7: Publish it where people get stuck
The best place for a software tutorial video is inside the help article for the same task, above or right below the written steps. Readers choose: skim the steps or press play.
YouTube is fine as a host and gets you some discovery, but don’t make it the only place the video lives. Wistia, Vimeo, Loom embeds or your docs platform’s own video support all work. What matters is that someone searching your help center for “connect calendar” lands on a page with both the steps and the video.
Which tool should you use?
Honest takes on the common options:
- Loom. Fastest way to record and share. Great for internal explainers and one-off answers to a customer. Hard to edit precisely, and talking while clicking is baked into how most people use it.
- Screen Studio (macOS). Records the screen and adds smooth automatic zooms and cursor effects. Makes polished walkthroughs with very little editing skill.
- Camtasia or ScreenFlow. Full editors built for screen recordings. More control, more learning curve. Worth it if you’ll make dozens of videos.
- Descript. Lets you edit the video by editing its transcript. Very good for voiceover-heavy videos and fixing flubs.
- OBS. Free and powerful, but you’ll still need a separate editor.
- Scribe or Tango. These capture your clicks and turn them into step-by-step guides with annotated screenshots, not narrated videos. For internal SOPs they’re often better than video. For customer-facing help they’re a different format.
How to keep walkthrough videos up to date
This is the part nobody plans for. You ship weekly. The video was perfect in March. By June the button moved and the video teaches the wrong thing, which is worse than no video.
Three things help:
- Keep the raw files and the script. With picture and sound recorded separately, a UI change usually means re-recording one or two scenes, not starting over.
- Track which videos show which screens. A simple table (video, screens shown, last recorded) lets you check the list when a PR touches a screen. It’s the same discipline as keeping your written documentation up to date.
- Script the recording. If you already automate screenshots (here’s how to create product screenshots automatically), Playwright can record video of the same flow:
import { chromium } from 'playwright';

const browser = await chromium.launch({ slowMo: 400 }); // slow enough to follow
const context = await browser.newContext({
  storageState: '.auth/demo.json',
  viewport: { width: 1280, height: 720 },
  recordVideo: { dir: 'videos/', size: { width: 1280, height: 720 } },
});
const page = await context.newPage();

await page.goto('http://localhost:3000/settings/integrations');
await page.getByRole('button', { name: 'Connect Google Calendar' }).click();
await page.getByRole('button', { name: 'Allow' }).click();
await page.getByText('Connected').waitFor();

await context.close(); // the .webm is written when the context closes
await browser.close();
Rerun it after a UI change and you get fresh footage of the exact same steps. The catch: headless recordings don’t show a mouse cursor, so you’ll want to inject a visible cursor or add click highlights in the edit, and you still need to lay the voiceover back on top. It’s a big time saver for frequently changing flows, not a finished video.
Getting walkthrough videos from your real app automatically
Ellie Docs can also produce short narrated walkthrough videos of a flow, recorded from your real app: captured screens plus a voiceover, sitting alongside the help articles it writes.
It works from the same understanding of your product that drives the rest of the help center. You connect a GitHub repo, Ellie reads the code to map routes, features and user-facing screens, then runs the app in a sandbox to capture what customers actually see.
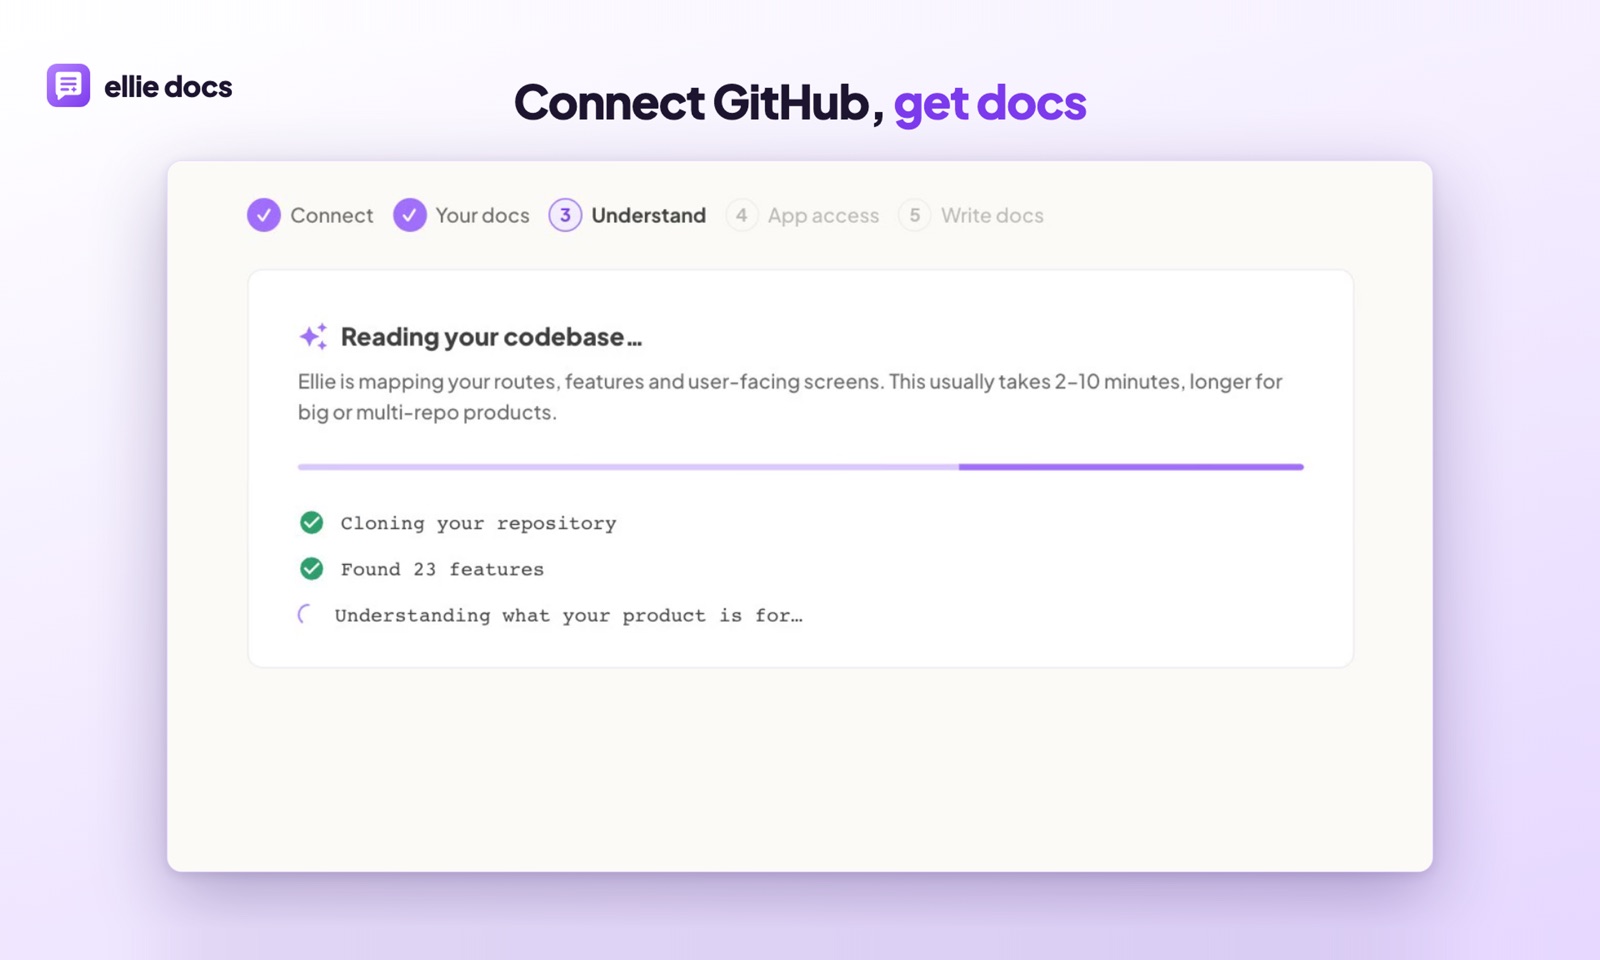
That doesn’t replace a hand-crafted launch video with your face in it. It’s for the long tail of “how do I do X” flows that you’d never get round to recording yourself.
Common questions
How long should a product walkthrough video be? For one task, 60 to 120 seconds. Longer than three minutes usually means you’re covering more than one task, so split it.
Should I show my face? For demos and launch videos, it helps. For a how-to video for your app, viewers want the screen. A face cam mostly covers UI they need to see.
Do I need a professional mic? No, but don’t use the laptop mic. A mid-range USB mic in a room with soft furnishings is plenty.
Video or written steps? Both, on the same page. Written steps are faster to skim and easier to keep current. Video helps with flows where position and movement matter.
If you want help articles, screenshots and walkthroughs that come from your real product, start with Ellie Docs for free. No card needed.